January ’19
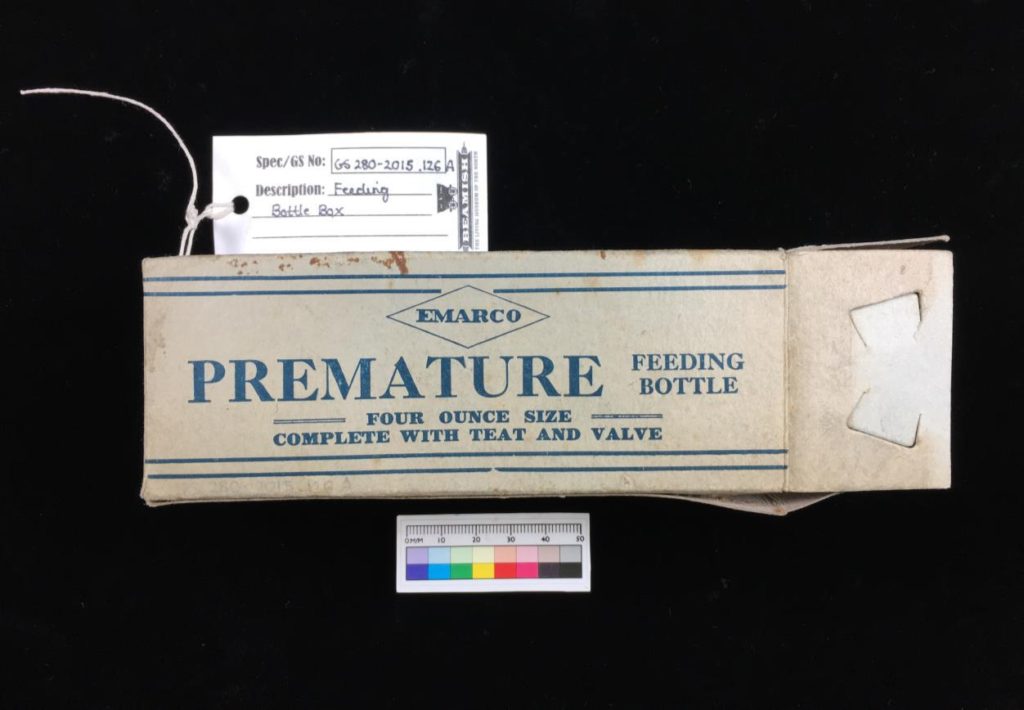
‘Emarco’ Glass Premature Feeding Bottle
Welcome to the new year and our first ‘Object of the Month’ of 2019 albeit a bit late but we’re only just back in the lab after an extended break over the holidays.
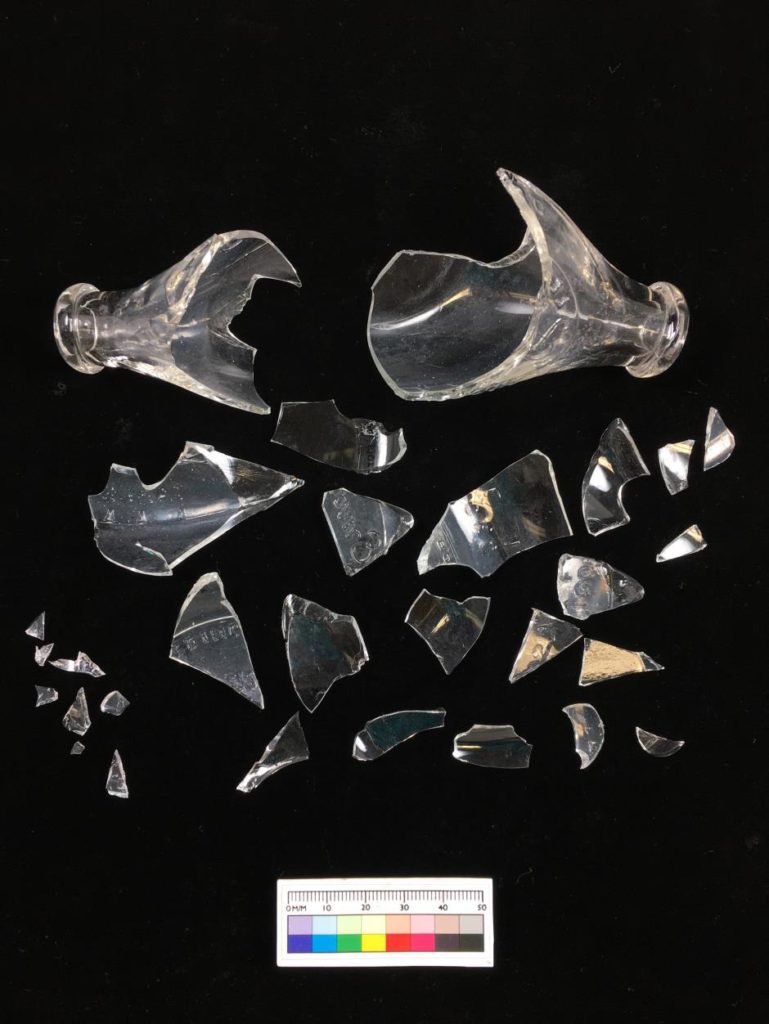
So January’s ‘Object of the Month’ is an early 19th Century ‘Emarco’ premature feeding baby bottle made in England; it is made from clear glass and is ‘banana’ shaped with two spouts. The baby bottle came with its original box but was missing the teat and valve that would have been part of the original object. The feeding bottle was donated to Beamish Museum in 2015 by an elderly couple who were downsizing to a bungalow. The object was part of the museum’s handling collection and was accidentally damaged by a visitor.
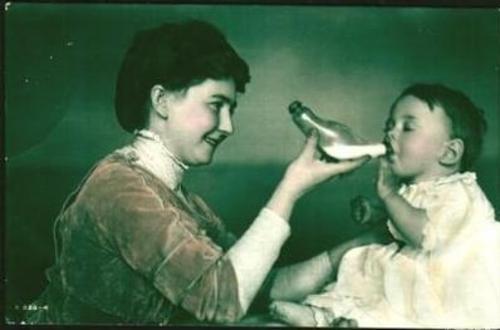
Throughout history feeding practices have changed, including the changing technology that allowed families to dry feed (hand-feeding) or hire a wet nurse since breast feeding was not always an option. From the 18th century, bottle manufacturers began to place more emphasis on comfort, ergonomics, and cleanliness. During the 19th century, bottles made of pewter were common, despite the high rate of mortality they caused. Over time, milk would break down and absorb the metal, which would then deliver a toxic concoction ingested by the nursing infant.
Until the late 19th century babies feeding equipment was difficult to clean and therefore very unhygienic. The Victorian period saw the development of patent medicines and medical products manufactured by companies in Britain and the USA as companies realised there was a need for these products. Cleanliness was a vital marketing ingredient, as both the medical profession and the public were beginning to realise that cleanliness and hygiene were important aspects of health care.
‘Banana’ shaped bottles are said to have first appeared towards the late 1800’s with the first real ‘banana’ feeder with a teat and a valve invented in 1894 by Allen & Hanbury’s. The popularity of this shape was good for about the next 50 years and outlasted many other designs. The distinctive shape of the ‘Emarco’ Premature Feeding Bottle suggests a manufacturing date in the early 19th century. Information about the company is very limited however, and so it is difficult to know the exact date of manufacture.
Double-ended bottles like this one improved the flow of milk by the use of a rubber valve at one end and a rubber teat at the other. They were also easier to clean because the valve and teat could be removed, and the bottle washed under a running tap, or sterilised with boiling water.
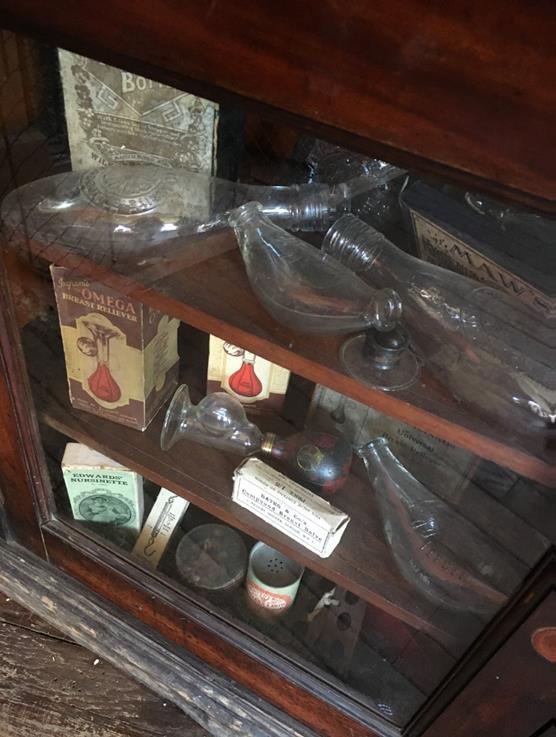
Similar feeding bottles are on display at the Chemist in Beamish Museum. Their collection comprises of many double-ended feeding bottles manufactured by various companies. They play an educational role on display, as well as during organised activities relating to the early NHS and maternity clinics where people can handle selected objects and speak to staff about them.
Conservation
The glass fragments were initially surface cleaned using cotton wool swabs and an appropriate solution in order to remove surface dirt and dust and improve general transparency. During this cleaning stage it was incredibly important to avoid cleaning the inner surface of the glass pieces to preserve the visible white residue which might be evidence of past use.

The bottle required adhering together in order to return to its original state, however it was important to understand where all of the sherds went. Therefore the initial stage in the process involved temporary re-assembly of the bottle using an appropriate tape that would not damage the surface but would hold the sherds firmly in place. This helped to see any areas of loss, the impact point, the original shape of the object, and it helped to decipher the letters and symbols present on the glass. Only four small fragments could not be re-fitted.

There are a number of adhesives that are frequently used in glass conservation and these were tested on a comparative glass object to observe curing time, strength, refractive index and reversibility. After a number of experiments a suitable adhesive was chosen and the glass fragments were organised into pairs. This would mean multiple sherds could be adhered at the same time. As the chosen adhesive had a long curing time, this method would reduce the overall hours needed to compete the adhesion of the bottle. Once all of the pairs had been adhered, they were added to one of the spouts and slowly built up until the bottle was in two halves. Finally these halves were joined, which revealed five areas that would require gap filling.

After a number of tests and experiments small sheets of clear casting resin were created by pouring the resin between two pieces of sealed melinex. This allowed the fill to be the exact thickness of the original glass and therefore the pieces would be able to be inserted easily. The areas of missing original material were traced from the bottle and cut from the resin sheet, this was then heated and manipulated into the desired curvature to match gaps in the bottle. These gap fills were adhered using the same adhesive as for the rest of the bottle and were fully documented should they ever need to be taken down in the future.

The cardboard box was surface cleaned using dry cleaning methods, which removed the surface dirt that was causing some discolouration. It was decided no further treatment of the surface was needed as the box was visually improved following this treatment.
Following cleaning there were two areas of concern that required stabilisation in order to prevent further deterioration. A join located at the side of the box had failed and was adhered using a suitable paper adhesive and held in place using a clamp in order to create a strong bond. A tear in one of the end flaps also required treatment and was backed using an appropriate material, and then colour matched in order to provide strength and stability. This meant that the box could be handled safely and opened/closed if necessary.
Stay tuned for next month’s object!